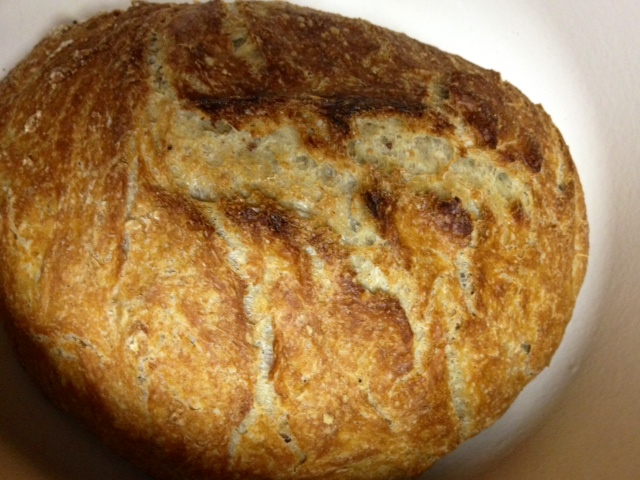
Heavenly Dark Chocolate Orange Babka
Even though I made this at least a month ago, I’ve been dreaming about it ever since. And forcibly restraining myself from making it again. Because this chocolate orange babka is what dreams are made of.
, this babka recipe uses dark chocolate and orange for an amazing flavor combo! Learn how to make babka and bring this to your next special occasion. #babka #darkchocolate #orange #chocolate #bread #challah #dessert #breakfast #bread")
As a flavor combo, chocolate and orange will always be a winner—particularly this kind of dark chocolate. One thing I really love about this recipe is that it uses a challah dough as the base, which makes the final result lighter and softer. I often find babkas a bit denser and drier than I like, so I was drawn to this particular recipe.
This is my happy place…
, this babka recipe uses dark chocolate and orange for an amazing flavor combo! Learn how to make babka and bring this to your next special occasion. #babka #darkchocolate #orange #chocolate #bread #challah #dessert #breakfast #bread")
The first step takes about 45 minutes, so make sure you’ve set aside enough time for everything. Take a bowl or tupperware container and whisk 1 cup (128 grams) of the flour with the yeast and water. Then cover with plastic wrap or the lid and let it rise about 45 minutes, or until puffy and bubbly.

Once your sponge is ready, we’re in business! In the large bowl of a stand mixer (or by hand if you prefer), add the yeast sponge, honey (or sugar), oil, eggs, zest, and vanilla. Give it a quick stir with the mixer, then add a cup of flour and the salt, and another two cups of flour (taking the total to 486 grams).
Stir until the dough forms a sticky mass. Determine at this point if you need more flour, but you DO want a pretty wet and sticky dough. If you’re using a stand mixer, knead in the mixer for about 5 minutes, until it’s smooth and elastic. Otherwise do it by hand for 5 to 8 minutes.
Transfer to a lightly oiled bowl (or the same sticky bowl the dough rose in), cover with plastic wrap, and let it rise until doubled in size. It should be 1-2 hours but could be longer depending on the temperature of your kitchen.


Once you’re ready to assemble, go ahead and make the filling. Melt the butter and chocolate together, stirring until smooth (I did this in the microwave at 30-second intervals). Then stir in the powdered sugar and cocoa until you have a smooth paste.
Turn your risen dough out onto a lightly-floured surface, and punch it down (“knock it back”) with your knuckles. I give it a knead for just a minute as well, to work the flour in. Divide into 2 equal parts, then use a floured rolling pin and roll the first half into a rectangle about 10-11 inches wide and 14-16 inches long.


Spread half of the filling over top, leaving a 1/2-inch border all the way around. Try not to drool.


Let’s just have a little more of that gratuitous melty chocolate spread, shall we???
, this babka recipe uses dark chocolate and orange for an amazing flavor combo! | finding time for cooking blog")

Okay, focus…
Spray 2 loaf pans and 1 small vessel (miniloaf pan, ramekin, etc.) with cooking spray and line with parchment paper.
Starting from the short end, carefully roll into a tight coil. Repeat with the other dough and filling. As mentioned above, you can put it in the fridge overnight at this point if you’re prepping ahead). Otherwise, transfer your two logs to the freezer to chill for about 5-7 minutes (you don’t want your filling to solidify).
Once the logs have chilled, place them on a large cutting board and trim the last inch (or less) off each log. Then cut the logs in half lengthwise and lay them next to each other cut sides up (the photos should help).

Gently lift each half over the other and twist them around each other, then transfer the twist as best as you can into one of the prepared loaf pans. Repeat with the remaining 2 halves. Take your trimmed ends and put them in the small vessel.
Cover pans with plastic wrap and let rise 1-1.5 hours at room temperature, or until the dough has risen and is filling the pan.


Preheat your oven to 375°F. Remove the plastic wrap, place the loaf pans on a sheet pan, and bake on the middle rack of your oven. Start with 25-30 minutes. Check the tiny pan around 20 minutes, as it will be done before the others. If the loaves start to brown too quickly, cover them with foil while they finish.
About 5 minutes before the babka is done, make your syrup. Place the orange juice/water and sugar in a small saucepan and bring to a simmer, stirring until the sugar dissolves. Remove from heat and set aside. Once the babka comes out of the oven, brush some of the syrup over the small pan, then pour half of the remaining syrup evenly over each of the loaves. Let them cool completely in the pans if you can control yourself…otherwise 15 minutes or so should do it.


Brace yourself for more gratuitous pictures of deliciousness…


This orange chocolate babka was seriously SO good! I took it to work the next day and it got completely devoured.

, this babka recipe uses dark chocolate and orange for an amazing flavor combo! Learn how to make babka and bring this to your next special occasion. #babka #darkchocolate #orange #chocolate #bread #challah #dessert #breakfast #bread")
Don’t be overwhelmed by the number of steps below—it’s actually not difficult, I just wanted to make sure to provide detailed steps. The biggest thing is time, making sure you’re not trying to rush things. It’s perfect to make this over the course of an afternoon, maybe on a weekend. And kudos if you can keep from eating it all immediately…you’re a stronger person than me!
Other twisty recipes you’ll love:
- Norwegian Skillingsboller (Cinnamon Buns)
- Orange Cinnamon Pistachio Morning Buns (+ How to Laminate Dough)
- Simple & Amazing Chocolate Brioche Babka
- Cranberry-Apricot Brioche Babka with White Chocolate
- Orange Cinnamon-Sugar Twist Bread
- Spiced Chocolate Tahini Swirl Bread
- Apple Butter Cinnamon-Sugar Babka
- Paul Hollywood’s Chelsea Buns
Chocolate Orange Babka
You can either make all at once, or prepare ahead and bake later. If you’re wanting to to prepare ahead, the best stopping point is after you roll up the dough (but before you slice it). I’ve also done it where you get the dough into the pan and ready to bake, then just put plastic wrap on and throw it into the fridge. Just make sure you bring it fully to room temperature before you bake, and probably let it rise a bit longer beyond that as well. You want the dough soft to the touch and filling the pan.
- 4 to 5 cups (486 grams to 614 grams) of all-purpose flour
- 1 package (2 1/4 teaspoons) of instant yeast
- 1 cup of water
- 1 tablespoon of kosher salt
- 1/4 cup of honey
- 1/2 cup of safflower, canola, grapeseed or other neutral oil
- 2 eggs
- Zest of 1 orange
- 2 teaspoons of vanilla extract
For the filling:
- 8 tablespoons of unsalted butter
- 3/4 cup (130 grams) of dark chocolate chips or chopped dark chocolate
- 1/2 cup (50 grams) of powdered sugar
- 1/3 cup (30 grams) of good cocoa powder
For the syrup:
- 1/3 cup of fresh-squeezed orange juice (or the juice of 1 orange plus enough water to make 1/3 cup)
- 6 tablespoons (75 grams) of sugar
- Make the dough: Whisk 1 cup (128 grams) of the flour with the yeast and water. Cover with plastic wrap or a dish towel (or just do it in a tupperware container) and let it rise about 45 minutes or until puffy and bubbly.
- In the large bowl of a stand mixer (or by hand if you prefer), add the yeast sponge, honey (or sugar), oil, eggs, zest, and vanilla. Give it a quick stir with the mixer, then add a cup of flour and the salt, and another two cups of flour (taking the total to 486 grams). Stir until the dough forms a sticky mass. Determine at this point if you need more flour, but you DO want a pretty wet and sticky dough.
- If you’re using a stand mixer, knead in the mixer for about 5 minutes, until it’s smooth and elastic. Otherwise do it by hand for 5 to 8 minutes. Transfer to a lightly oiled bowl (or the same sticky bowl the dough rose in), cover with plastic wrap, and let it rise until doubled in size. It should be 1-2 hours but could be longer depending on the temperature of your kitchen.
- Make the filling: Melt the butter and chocolate together, stirring until smooth (I did this in the microwave at 30-second intervals). Then stir in the powdered sugar and cocoa until you have a smooth paste.
- Assemble: Once your dough has risen enough, turn it out onto a lightly-floured surface, and punch it down (“knock it back”). Divide into 2 equal parts, then use a floured rolling pin and roll the first half into a rectangle about 10-11 inches wide and 14-16 inches long. Spread half of the filling over top, leaving a 1/2-inch border all the way around.
- Starting from the short end, carefully roll into a tight coil. Repeat with the other dough and filling. As mentioned above, you can put it in the fridge overnight at this point if you’re prepping ahead).
- Otherwise, transfer your two logs to the freezer to chill for about 5-7 minutes (you don’t want your filling to solidify).
- Spray 2 loaf pans and 1 small vessel (miniloaf pan, ramekin, etc.) with cooking spray and line with parchment paper.
- Once the logs have chilled, place them on a large cutting board and trim the last inch (or less) off each log. Then cut the logs in half lengthwise and lay them next to each other cut sides up (the photos should help). Gently lift each half over the other and twist them around each other, then transfer the twist as best as you can into one of the prepared loaf pans. Repeat with the remaining 2 halves. Take your trimmed ends and put them in the small vessel.
- Cover pans with plastic wrap and let rise 1-1.5 hours at room temperature, or until the dough has risen and is filling the pan.
- Preheat your oven to 375°F. Remove the plastic wrap, place the loaf pans on a sheet pan, and bake on the middle rack of your oven. Start with 25-30 minutes. Check the tiny pan around 20 minutes, as it will be done before the others. If the loaves start to brown too quickly, cover them with foil while they finish.
- Make the syrup: Place the orange juice/water and sugar in a small saucepan and bring to a simmer, stirring until the sugar dissolves. Remove from heat and set aside. Once the babka comes out of the oven, brush some of the syrup over the small pan, then pour half of the remaining syrup evenly over each of the loaves. Let them cool completely in the pans if you can control yourself…otherwise 15 minutes or so should do it 🙂
Adapted slightly from PopSugar
Pin for later!
, this babka recipe uses dark chocolate and orange for an amazing flavor combo! Learn how to make babka and bring this to your next special occasion. #babka #darkchocolate #orange #chocolate #bread #challah #dessert #breakfast #bread")