“Elvis” Banana, Salted Honey, & Peanut Butter Cream Puffs + A Super Late Happy Birthday
Every year I make my own birthday cake, using it as an excuse to try something indulgent and a bit more complicated than my usual. But this year’s orange and salted honey cake was a disappointment. Just kind of meh. So about a month later I decided I deserved a re-do…and THUS these peanut butter, banana, and salted honey cream puffs were born!


This idea came out of two different things…I had wanted to to try my hand at choux pastry for quite a while. It’s an entirely new baking technique for me, and my obsession with the Great British Bake-Off had finally pushed me to needing to try it.
Secondly, the one bright spot in my sad birthday cake debacle was trying out pastry cream (custard) for the first time and falling in love with this subtle, addictive salted honey pastry cream. So I wanted that to play a role in this recipe somehow.

So then I thought, what goes with honey?? Peanut butter, of course! And if you’re a lover of the traditional “Elvis” sandwich, then banana as well. I liked that the banana brought a fresh flavor and different texture to the whole thing.
Overall, making the choux was really easy! Like, shockingly easy. Piping it was a bit tricky since I’m terrible at piping. My biggest frustration was that I didn’t have a piping tip big enough for good-size eclairs. So I mostly went with the cream puffs since those turned out awesome.

The order of things does make a difference, but the good thing is you can make different pieces at different times.
- In particular, I like to make the salted honey custard the night before so it can chill in the fridge all night. At minimum, it will require 2-3 hours to get good and cold and solidly set.
- The choux needs to cool after baking, so needs extra time (at least 30 minutes, ideally more, after removing from the oven.
- The glaze can be made at the last second.
Salted honey pastry cream
This was my first time making pastry cream or custard, but it was really easy and the result was delicious. You can read the in-depth post for this salted honey pastry cream here, so I won’t put all those details in this post.
Plan for 25-30 minutes start to finish. Once it’s done, cover the surface of the hot custard with cling wrap and put in the fridge to cool (overnight if possible).

Choux pastry for the cream puffs and éclairs
We’ll start here with making the choux, because you want those to have time to get good and cool before filling. Preheat your oven to 400°F.
Line two baking sheets with parchment paper and lightly brush the parchment with water. This creates a humid environment for the pastry shells, which allows them to puff up without drying out or burning. Yay science!
In a medium saucepan, combine the butter, water, milk, salt, and granulated sugar together over medium heat. Stir until the butter has melted, then bring the mixture to a simmer.

Once it’s simmering, reduce the heat to low and add the flour all at once. Stir until the flour is completely incorporated, and a thick dough clumps into a ball.
Really mash the dough ball against the bottom and sides of the pan for 1 minute, which helps gently cook the flour. This was oddly therapeutic.

Remove from the heat and transfer the clump of dough to the bowl of a stand mixer with a paddle attachment. Allow it to cool down for a few minutes…I like to very slowly run the mixer a few times to help the cooling process.
I suggest you read this whole section before proceeding: With the mixer running on low speed, slowly add the beaten eggs in 3-4 separate additions, mixing for 30 seconds between each. You may have to scrape down the sides a bit between additions. The mixture will look a little curdled at first, but it will begin to come together as the mixer runs.
Pour in the final addition of beaten eggs very slowly and STOP adding when the choux pastry has reached the desired texture—you may not need all the egg! It should be shiny, thick, and smooth with a pipeable consistency. You want it to have a nice “V drop” (see third pic below), which is how you know you have the right consistency. It’s common to leave a few teaspoons of beaten egg behind, which can be used with the egg wash.


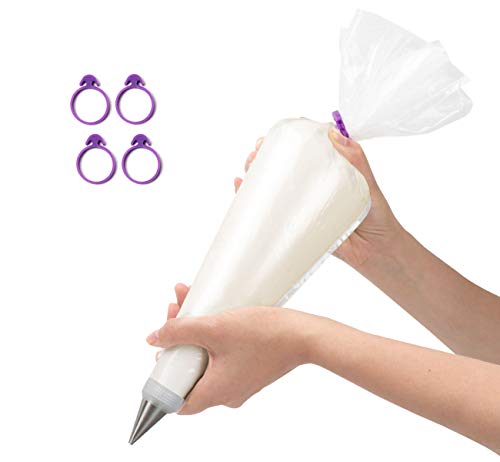
Transfer the choux pastry dough to a piping bag (or large ziploc with the corner cut) fitted with a large round piping tip (I’ve seen Ateco #809 recommended, I don’t have that one).
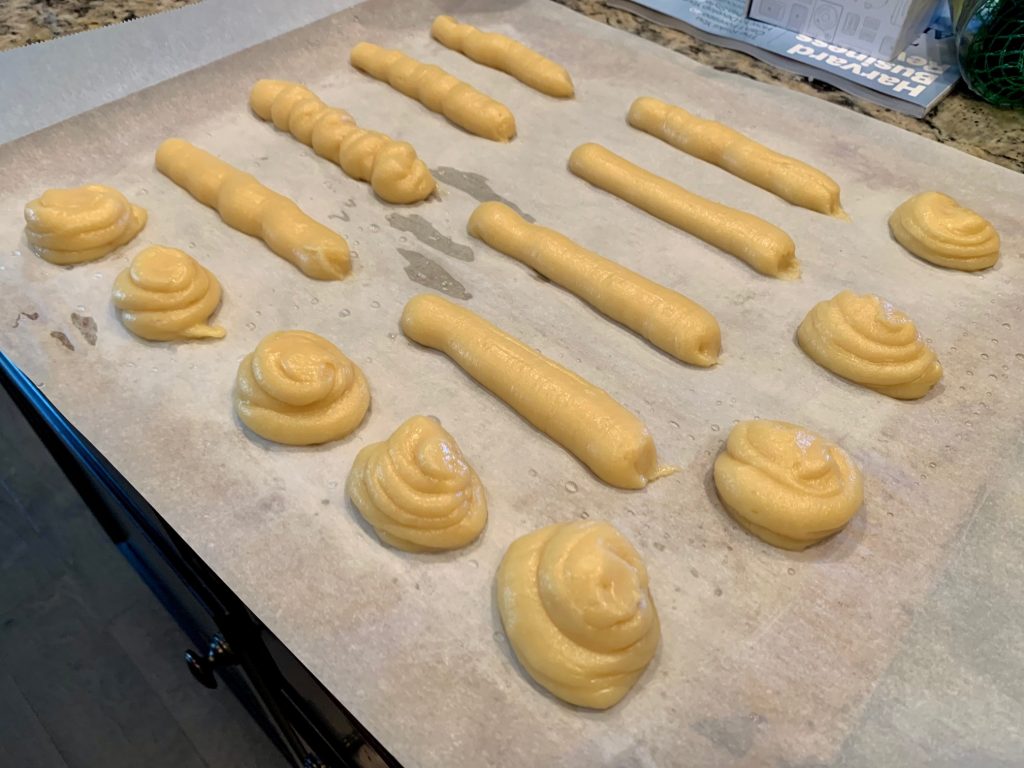
For cream puffs or profiteroles, pipe a large circle or dome. For eclairs, pipe 5-inch logs on the damp parchment far enough apart that they won’t touch even once they grow in the oven. Using a water moistened finger, smooth down any peaks or ends, then lightly brush each log with egg wash.

Bake for 20 minutes at 400 F, then reduce the oven to 350°F and continue baking for 10-15 more minutes until golden brown and hollow. Do not open the oven as the pastries cook, as cool air will prevent them from properly puffing up. I felt like mine needed more even after the full extra 15 minutes, to get good and crisp.
Remove from the oven and transfer to a cooling rack. Using a toothpick, poke a hole in the end or bottom to allow the hot air to escape, which keeps them from getting soggy as they cool. Then allow them to cool completely before filling.


Peanut butter glaze
Once your choux buns are cool and your custard is cold and set, make the glaze. In a medium mixing bowl, whisk together peanut butter and melted butter. Add sifted confectioners sugar and vanilla and whisk until smooth.
It may look clumpy at first but keep whisking, it will become smooth. As necessary, add a tiny bit of milk until it’s the right consistency…it should be thick but easily spreadable.
You can warm it up in a microwave to make it more drizzling consistency. I like to add a hefty pinch of sea salt to amp up the savory (there’s plenty of sweet in this recipe).

Assembling the banana, salted honey, & peanut butter cream puffs
Use a toothpick to prick a hole in one end of each éclair shell or in the side of the cream puffs, big enough to get the piping tip into. Use a piping bag and small round tip to pipe the custard in until it’s full.
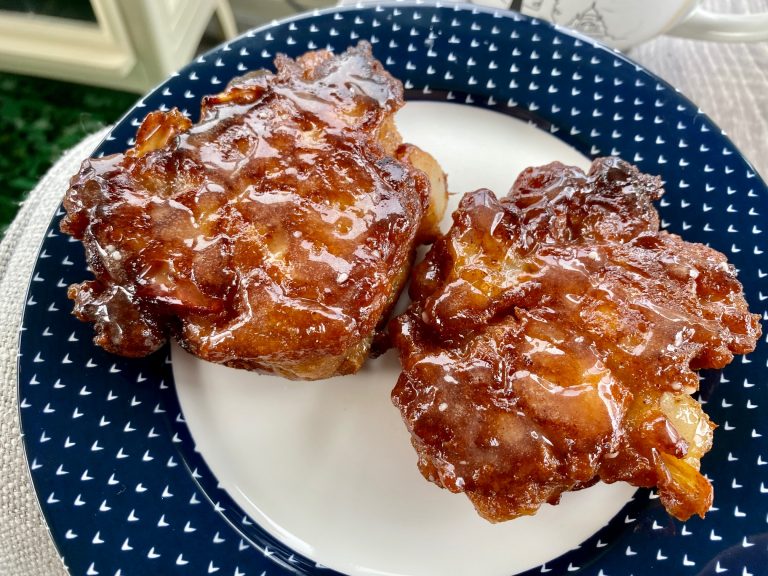
Dip the top of each in the peanut butter glaze, and place on a serving plate or cooling rack until ready to serve. Top with small banana slices.


Technically you can cover and store the leftover filled pastries in the refrigerator for up to 3 days, but honestly these are best fresh and I feel they really lose something once refrigerated. Not worth the calories.
Now THIS was the birthday treat I was hoping for, and I was so excited by how easy the choux was to handle! Gimme these peanut butter, banana, and honey cream puffs ERRRY DAY!
Tools that will come in handy: large piping bag, large piping tip & thin piping tip for filling, as well as a pastry brush
Other birthday treats you’ll love:
- How to Make Pasteis de Nata (the Iconic Portuguese Custard Tart)
- Caramelized White Chocolate & Coffee Tarts
- Smitten Kitchen’s Whole Lemon Tart
- Vanilla Coke Spice Cake with Salted Peanut Frosting
- Chocolate Stout Cake with Ganache
- Vanilla Almond Cupcakes with Peach Jam Filling
- Coffee Cardamom Cake with Bulletproof Frosting
- Pineapple Cheesecake with Macadamia Crust
- Another French delicacy: The Lazy Person’s Kouign Amann
I used the detailed choux instructions from Sally’s Baking and glaze adapted from Crunchy Creamy Sweet
Don't be alarmed by the detailed instructions, these "Elvis" banana and peanut butter cream puffs with salted honey filling are simple enough to pull together and absolutely delicious! As an Amazon Associate and member of other affiliate programs, I earn from qualifying purchases.
"Elvis" Banana, Salted Honey, & Peanut Butter Cream Puffs
Ingredients
Instructions
Line two baking sheets with parchment paper. Lightly brush the parchment with water...this creates a humid environment for the pastry shells, which allows them to puff up without drying out or burning. Yay science!Notes
Recommended Products