Easy No-Bake Vegan Cheesecake with Blueberry Compote (GF, Almond-Free)
If, a few years ago, you’d told me that I’d be figuring out how to have a gluten-free, dairy-free, almond-free, egg-free Thanksgiving, I’d have died laughing. DIED.
And yet, here we are. And one of the recipes that made it not only palatable but also quite enjoyable was this delicious, easy no-bake vegan cheesecake with a punchy blueberry compote.

I’ve done quite a bit of gluten-free baking in my day, but my current dietary restrictions (for food sensitivity reasons) of gluten, dairy, almonds, AND eggs has presented quite an interesting set of challenges.
Plus, I really don’t like using a lot of the store-bought vegan dairy options as they’re packed with all sorts of weird ingredients. So as much as possible I’ve been trying to use real, natural ingredients…which is why this is a no-bake *cashew* cheesecake rather than using vegan cream cheese.
Both the crust and filling come together in the food processor and blender (one or both). I’ve tried a couple different crusts but this date and walnut one is definitely best for the no-bake. The filling, likewise, is just chucking stuff in and blending it into oblivion.
Easy, delicious, pretty darn healthy—I’m declaring this no-bake vegan cheesecake recipe a winner!

You might also like: The Kitchen Tools & Gadgets I Swear By
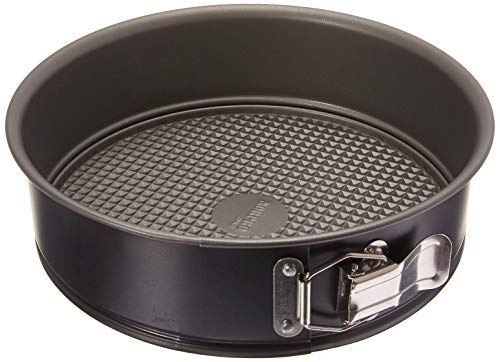
A few notes before we dive in, specifically around what pan you’re using. I’ve made this both as an 8-inch full cheesecake (you’ll want a springform or loose-bottom pan) or as individual mini-cheesecakes (you’ll want either a silicone large muffin tin or loose-bottom). I don’t recommend a 9-inch pan, the proportions were not great.
Why do I recommend those specific types of pans?? Because *removing* the cheesecakes will be a BIG hassle otherwise. If you want to do mini cheesecakes and only have a large muffin tin or ramekins, you can cut two strips of parchment paper per ramekin/muffin and lay them in an “X” shape at the base (each strip should come above the edge). This should make them it easier to remove once chilled (freezing for 15 minutes helps with the removal as well).
You can see the different pans I’ve used in the recipe pics below.

There is a tiny bit of planning ahead that you should do. You’ll want to make sure you soak your cashews ahead of time…either overnight in cool water overnight, or in boiling water for 1 hour. I’ll give you one guess which one I always end up doing 🙂
Next add the walnuts, cinnamon, and salt to the food processor, and process into a medium-fine meal. Then add the dates back in (I break the ball into chunks) and pulse then blend until a loose dough forms.
It will look crumbly but should stick together when you squeeze a bit between your fingers. If it’s too dry, add a few more dates through the spout while processing. If too wet, add more nuts. I’ve never had any issues or had to add anything extra.


Divide the crust among the individual muffins or pour it all into an 8-inch springform or loose-bottom pan. Gently press with your fingers to evenly distribute and pack it down. You can allow some crust to come up the sides, but I usually do it flat.
Accidental hack…I’ve made two individual ones and the 8-inch from the same batch and it was actually perfect! So enough for guests, and then two little ones to have as your own treat.
Set in fridge or freezer to firm up (ideally 30-60 minutes, but less is okay and only 15 in the freezer is fine).


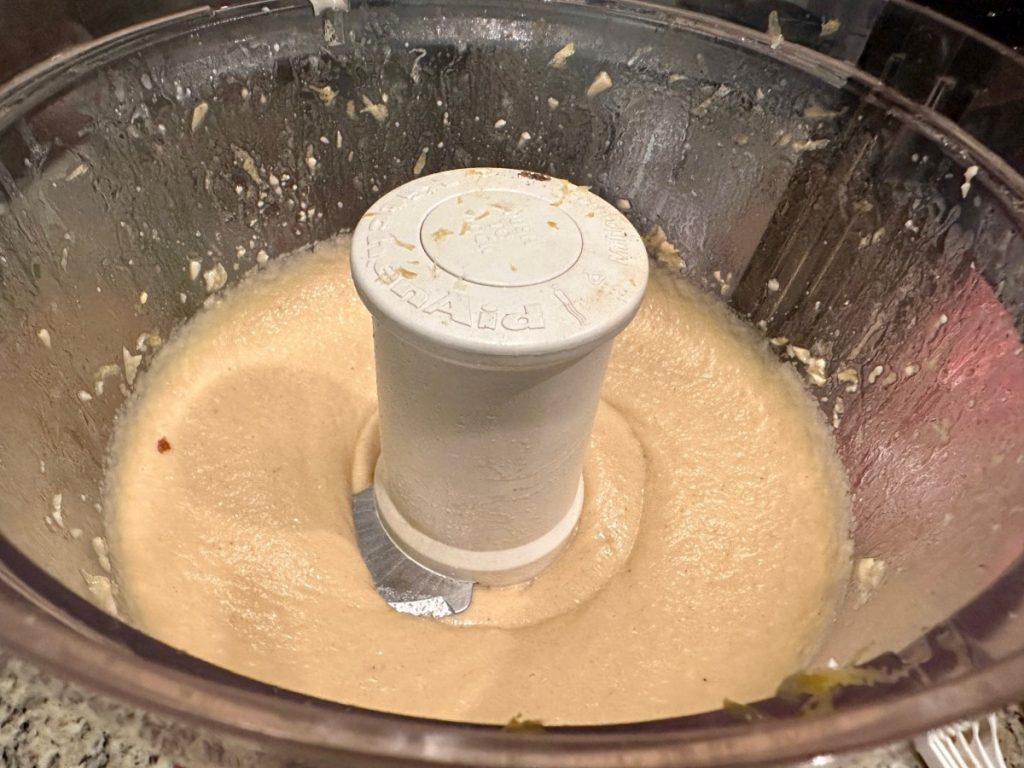
Now we make the filling. Add all the filling ingredients to a blender and blend until VERY smooth (not grainy if possible). This will take at least 2 to 3 minutes. If it won’t come together, add a touch more lemon juice or a splash of the milk to help it blend better.
Scrape down sides as needed and blend until very creamy and smooth. Taste and adjust flavor/sweetness as needed. I usually end up adding a bit more lemon juice as I like a tangier cheesecake. Note, realize that the flavor once it’s chilled and set is always a bit better.
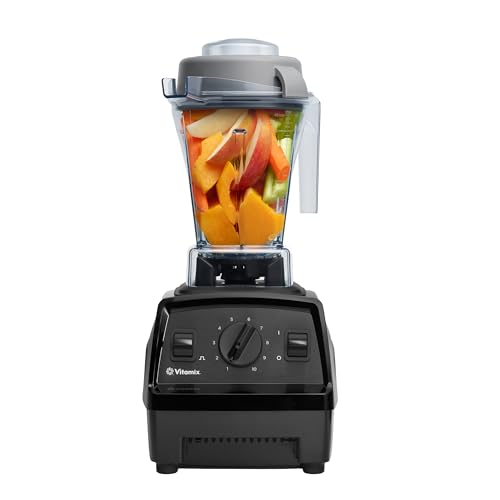
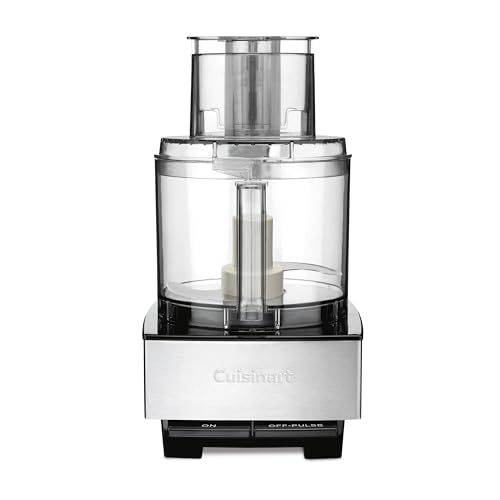
As I mention above, a really good blender (like a Vitamix) does this job better and gets a creamier result. BUT, you can absolutely use a food processor (like below, which isn’t totally creamy yet) and it’ll turn out fine. I did the first couple times I made it.
Divide the filling evenly among the muffins/ramekins or pour all of it into your springform pan on top of the crust. Tap a few times to release any air bubbles, then cover loosely with plastic wrap and refrigerate until set. I’m realizing I didn’t get a pic of this part.
Setting will take 6-8 hours depending on size of dish. If you’re in a rush, you can expedite this process by popping it into the freezer for at least 2 hours (they do come out of the muffin tins much easier after being in the freezer for a bit!)
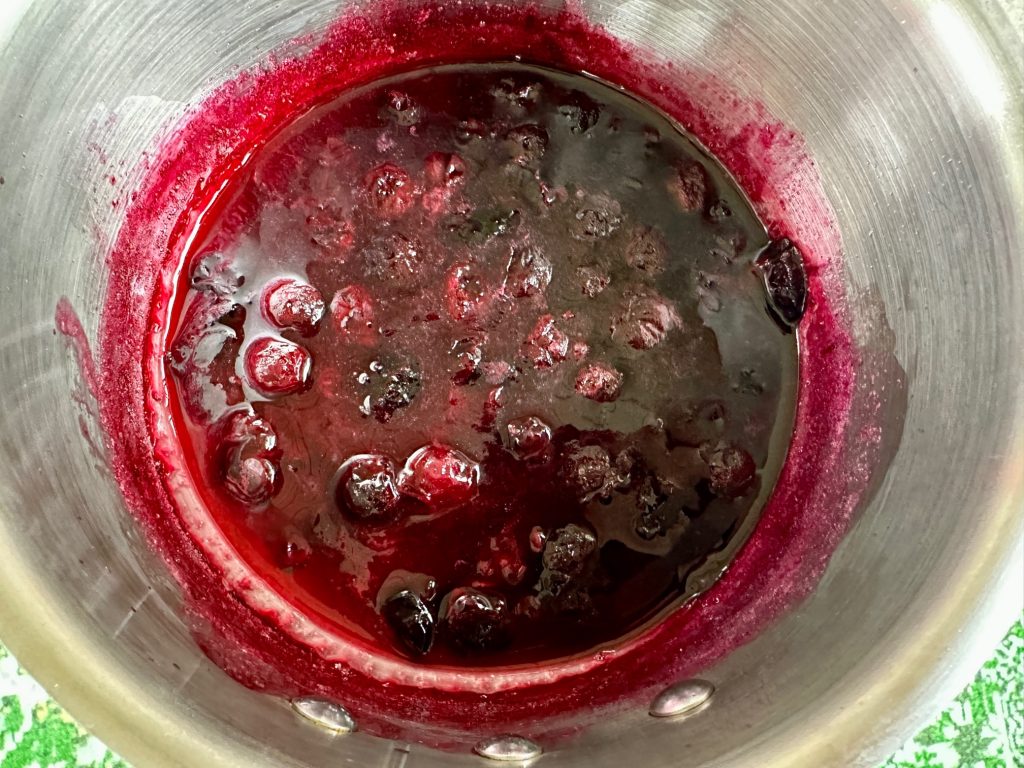
While the cheesecake is chillin’, make the compote. Combine the blueberries, maple syrup, lemon juice, water, and salt in a small saucepan over medium heat.
Bring it to a boil, then reduce to a simmer and cook, stirring occasionally, for 10 minutes. About halfway through you can start popping the blueberries with your spoon/spatula.
Remove from the heat and stir in the vanilla. Allow to cool and thicken. Once cooled, store in the refrigerator.
Once your cheesecake is set, either gently release you springform or remove the loose-bottoms. Or you can tug on your parchment tabs in an upward motion to help them pop right out. If they aren’t quite set, pop them in the freezer for 15-20 minutes and they should come out easily.
Serve the cheesecake with compote on top. Both will keep in the fridge for a few days (the compote will last up to a week).


I am obsessed with this gluten-free no-bake vegan cheesecake and it’s become #1 or #2 on my go-to dessert list! I love how hands-off it is and the fact that making it ahead is actually an asset.
Read the notes in the recipe and check out the linked gear and ingredients before getting started. In particular, I’ve given some thoughts on food processor vs. a really good blender, which pans will work best, and I tend to buy some of the quality ingredients in bulk online (like the cashews and dates).
Other delicious desserts you’ll love for dietary restrictions:
- Amazing Dark Chocolate Tahini Cookies (GF, vegan, nut-free)
- Healthy Banana Almond Butter Donuts with Chocolate Glaze (GF, dairy-free, no refined sugar)
- Super Healthy Fudgy Date Brownies (GF, vegan, nut-free, no refined sugar)
- Tahini Maple Oat Bars with Dark Chocolate Chunks (GF, Vegan)
- Peanut Butter & Honey Ice Cream with Sea Salt (GF, vegan)
- Indulgent-Feeling Dark Chocolate Banana “Nice Cream” (gluten-free, dairy-free, sugar-free)
- Easy & Awesome Gluten-Free Gingerbread Cookies (also vegan & nut-free)
Adapted slightly from Minimalist Baker; they have great recos for other ingredient substitions if you need them
Pin for later!


Easy No-Bake Vegan Cheesecake with Blueberry Compote (GF, Almond-Free)
This super easy no-bake vegan cheesecake is gluten-free, almond-free, and packed with REAL ingredients vs. weird store-bought chemical ones. A delicious no-bake cashew cheesecake with only a few minutes of hands-on time and a great make-ahead dessert option for those with dietary restrictions!
Ingredients
- CRUST
- 1 cup of packed PITTED medjool dates (should be ~22 dates or 275g)
- 1 1/2 cups of raw walnuts
- 1 strong pinch of sea salt
- 1/2 teaspoon of ground cinnamon
- FILLING
- 1 1/2 cups of raw cashews (soaked overnight in cool water, or in very hot water for 1 hour)
- 1 teaspoon of vanilla extract
- Zest of 1 medium lemon
- Juice of 3 medium lemons
- 1/4 cup of plain unsweetened almond milk (or can sub milkadamia or rice milk)
- 1/4 scant cup of olive oil (or can sub melted coconut oil, may take on a coconut flavor)
- 3/4 cup of melted white chocolate (see notes)
- 1/4 teaspoon of sea salt
- Optional (but recommended): 1 teaspoon of apple cider vinegar (brings extra tang)
- BLUEBERRY COMPOTE
- 1 cup of fresh or frozen blueberries
- 2 tablespoons of maple syrup
- 1/2 cup of water
- Pinch of sea salt
- 1-2 tablespoons of lemon juice
- Splash of vanilla extract
Instructions
- Soak your cashews: Either soak them in cool water overnight or in boiling water for 1 hour. Then drain once ready to use.
- Prep your pan(s): You can make this as an 8-inch cheesecake or individual ones. If you're not using large silicone muffin tins or loose-bottom ones for individual, make sure to cut out two strips of parchment paper per ramekin and lay them in an "X" shape at the base (it should come above the edge); this will make it easier to remove.
- Make the crust: Add your dates to a food processor and blend until small bits remain and it forms into a ball. Remove and set aside.
- Next add the walnuts, cinnamon, and salt to the food processor, and process into a medium-fine meal.
- Then add the dates back in (I break the ball into chunks) and pulse then blend until a loose dough forms. It will look crumbly but should stick together when you squeeze a bit between your fingers. If it’s too dry, add a few more dates through the spout while processing. If too wet, add more nuts.
- Divide the crust among the individual muffins or pour it all into an 8-inch springform or loose-bottom pan. Gently press with your fingers to evenly distribute and pack it down. You can allow some crust to come up the sides, but I usually do it flat. Set in fridge or freezer to firm up.
- Make the filling: Add all filling ingredients to a blender (or food processor, see notes) and blend until VERY smooth (not grainy if possible). This will take at least 2 to 3 minutes. If it won't come together, add a touch more lemon juice or a splash of the milk to help it blend better.
- Scrape down sides as needed and blend until very creamy and smooth. Taste and adjust flavor/sweetness as needed (I usually end up adding a bit more lemon juice).
- Fill & chill: Divide filling evenly among the muffins/ramekins or pour all of it into your springform pan on top of the crust.
- Tap a few times to release any air bubbles, then cover loosely with plastic wrap and refrigerate until set. This will take 6-8 hours depending on size of dish. If you're in a rush, you can expedite this process by popping it into the freezer for at least 2 hours (they do come out of the muffin tins much easier after being in the freezer for a bit!).
- Once set, run a butter knife along the edge and gently remove by tugging on the tabs in an upward motion. They should pop right out. If they aren’t quite set, pop them in the freezer for 15-20 minutes and they should come out easily.
- Make the compote: Combine the blueberries, maple syrup, lemon juice, water, and salt in a small saucepan over medium heat. Bring mixture to a boil, then reduce to a simmer and cook, stirring occasionally, for 10 minutes. About halfway through you can start popping the blueberries with your spoon/spatula.
- Remove from the heat and stir in the vanilla. Allow to cool and thicken. Once cooled, store in the refrigerator.
- Serve the cheesecake with compote on top. Both will keep in the fridge for a few days (the compote will last up to a week).
Notes
- You can technically make both the crust and the filling in EITHER a really good blender (like a Vitamix) or a food processor. If you have to use only one or the other, I'd go with a good food processor myself. However, I've found that the crust does better in the food processor but my Vitamix gets me the creamiest least-grainy filling.
- The original recipe calls for a combination of food-grade cocoa butter and maple syrup to approximate both the sweetness and texture that white chocolate brings. For me, using white chocolate is simpler (and the lemon cuts the sweetness). I've also used caramelized white chocolate (and recommend orange juice/zest as the pairing in that case).
- Adapted slightly from Minimalist Baker; they have great recos for other ingredient substitions if you need them
Recommended Products
As an Amazon Associate and member of other affiliate programs, I earn from qualifying purchases.