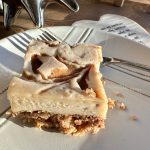
Swirled Apple Butter Cheesecake (Vegan, GF, Dairy-Free, Almond-Free)
This swirled apple butter cheesecake is easy and delicious, especially perfect for the holidays. It's also vegan (dairy-free and egg-free) and gluten-free! Make this for Thanksgiving or any time you need something special for those with dietary restrictions.
Servings: 1 cheesecake
Ingredients
- 3/4 cup apple butter I use homemade, see link in post
- CRUST
- 1 heaping cup of rolled oats ensure gluten-free for GF eaters
- 1 heaping cup of raw almonds or pecans, if allergic
- 1/4 teaspoon of sea salt
- 2 tablespoons of maple syrup
- 4-5 tablespoons of melted coconut oil
- FILLING
- 1 cup of raw cashews
- 1 cup of coconut cream*
- 1 1/2 tablespoons of arrowroot powder or cornstarch
- Zest of 1 lemon or 2, if your lemons are tiny
- 3 or more tablespoons of fresh lemon juice ~1 large lemon
- 1 pinch of sea salt
- 1/4 cup of maple syrup plus more to taste
- 1/2 teaspoon of ground cinnamon
Instructions
- Prep work: Make sure you make your apple butter ahead of time if doing homemade (which I recommend, it's SO easy and delicious). It needs to be fully cool. Otherwise you can use store-bought.
- Preheat your oven to 350 F (176 C) and line either an 8x8 baking dish with parchment paper (including up the sides so you can lift the whole thing out), or grease a round 8-inch springform pan
- About 30 minutes ahead of time, add your raw cashews to a small mixing bowl and cover with boiling water. Let them rest for 30 minutes (or up to 1 hour ) uncovered. Then drain thoroughly.
- Make the crust: Add the oats, almonds, and sea salt to a high-speed blender or food processor and blend on high until a fine meal is achieved.
- Transfer to a medium mixing bowl and add the maple syrup and melted coconut oil. Start on the lower end of the coconut oil amount (around 4 tablespoons or 60g) and then add more if your mixture is too dry. Stir with a spoon to combine until a loose dough is formed (you should be able to squeeze the mixture between your fingers and form a dough instead of it crumbling).
- Transfer the crust mixture to your prepared pan and spread flat and evenly. Then place parchment paper on top and use a flat-bottomed object, such as a drinking glass (or even your hand will do), to press down firmly until it’s evenly distributed and well packed.
- Bake for 15 minutes, then increase he temp to 375 F (190 C) and bake for 4-6 minutes more, until the edges are golden brown and there is some browning on the surface. Remove from the oven to cool slightly, and reduce the oven to 350 F (176 C).
- Make the filling: Put your soaked and drained cashews in a (clean) high-speed blender with the coconut cream, arrowroot starch, lemon zest, lemon juice, sea salt, maple syrup, and cinnamon. Blend on high until it's very creamy and smooth, scraping down the sides as needed.
- Taste and adjust flavor as needed. I almost always have to add a bit more lemon zest and juice for tanginess. You can also add more maple syrup if it needs more (do remember that the apple butter will add sweetness as well). You want a balanced tangy vs. sweet flavor.
- Take your cooled crust and plop a few spoonfuls of apple butter on top, then spread into a thin layer. Pour the cheesecake filling on top and spread into an even layer. Tap on the counter to remove any air bubbles.
- Dollop the remaining apple butter in small spoonfuls (~1 tablespoon each) around the top of the filling and use a toothpick or knife to create a swirled effect. TIP, do not go overboard on the size of your apple butter dollops! This will make the filling split and fall apart.
- Bake for 20-25 minutes or until the edges look very slightly dry and the center appears “jiggly” but not liquidy. It will be a little golden brown on top (especially around the edges) but only slightly. Resist the temptation to overbake and keep a close eye on it after 15 minutes.
- Let the cheesecake rest for 10 minutes, then transfer to the refrigerator to chill for at least 6-8 hours or until totally set (preferably overnight).
- To serve, gently lift out of the pan and slice into even bars or wedges. Leftovers will keep in the fridge (covered) for up to 4 days, though it's best within the first 2 days.
Notes
- You can use storebought apple butter or make your own...it's super easy and more delicious! My stovetop recipe is linked in the post.
- I haven't had a chance to try it yet, but you could try making a gluten-free graham cracker crust instead.
- For the crust, I have subbed pecans for the almonds and it works perfectly.